Home Studio Project – Results
My Home Studio Project – Results
Home Studio Project – Results
My home studio project started out only as a thought several years ago. It was only a dream that finally had moved into the real world, accomplished only through direct action. I never thought that I would do construction especially a major remodeling job on my own. I had no clue as to what kind of results I was going to get building my new home studio myself. After all, I thought I didn’t have the skill to actually do it.
Never in all of my years of living has construction been something I wanted to do or would have chosen to do for a living. I took years to move my dream of a home studio from merely a thought to the full manifestation of it. I didn’t think I would have ever begun such an undertaking where I could actually accomplish what I had set out to do, otherwise, I would have been more eager to begin long ago. I had many excuses including the claim of not having enough money or talent to pull it off. Forget about the results when you don’t have the resources to try and there were many reasons not to try.
As the old saying goes: Just Do It!
I am not really sure where the energy came from for completing this project other than the fact that for years I wanted to have a “place” to make music that would make me feel comfortable and inspired by my environment, specifically a a home studio to work in and a music creation DAW, digital audio workstation, where I could continue my work as a composer.
My friend Jeff from New York was the instigator, so to speak. His visit and support to put in some electrical outlets in the basement area, where I was writing music, left me with a desire to attempt to put together the final plans. In doing this I found I had supercharged and employed my emotions enough towards doing this project that taking action was the only solution. At that point I began to take the steps necessary to build my home studio. One thing became very certain to me, I had to give it the old college try.
When finalizing the plans for my new studio, I felt that the general floor plan and layout that would suit me and my work flow required a space for enabling computer work, a space for composing, a place for practicing and playing the classical guitar and a place to store my resource materials and other tools needed for all of these efforts.
I also wanted to have a place where I could read and study more about the classical guitar and its music, classical music in general, to store the software needed to produce the music I write and to further my ongoing study of music composition in general. It turns out that my new studio does all of that for which I am very satisfied with the completion of this project. There are a few things that remain to be finished and they will be once the funding becomes available. For now, my new home studio is a far cry from cement walls and pipes and the normal things one sees in an unfinished basement area.
I did not write this blog post series to slap myself on the back in a weak attempt at self praise. I wrote it to hopefully inspire others to begin their own project, to build something they had longed for but just couldn’t get out of the gate. I wrote it to demonstrate some of the things a person would run into while doing a home studio project such as this and to hopefully help others in some small way, making their pathway easier than mine was. It is my hope that this series of posts accomplishes that. I’d love to hear your feedback!
Now, here we are after nine long weeks, mostly nights and weekends, of strenuous physical labor and mental exercising, that this project has come very close to an end. It saddens me in a way but mostly it excites me to finally have a super nice studio to work and play in. So far I’ve been pretty happy with the results, so far!
To start off this article showing the results of my efforts, the following two photos show the most difficult part of this construction. One of the photos was used in a previous post in this series and the other is a newly introduced one. Here are the before and after pictures. (I hope you can see the way it was built and what challenges were involved in doing so from these photos.)
Hidden behind the door shown in the lower photo is the furnace. The inner wall insulation and the wood provide sound deadening to drastically lower the sounds coming from the furnace. The furnace was always a monster of a problem for one who writes music in a nearby space.
Hidden above from the center and to the left is the vent work suspended below the plane of the ceiling and hidden behind the new wall on the right is one of the concrete block walls that was pretty bland looking and I needed to hide it. These photos are very good in demonstrating what doing this project was all about. It has made an enormous difference in the appearance of the room and it has made the room considerably more quiet. As a side note, I have been thinking about adding some additional sound absorbing material behind the new door and on the side of the walls facing the furnace to make it even more quiet. The 16″ insulation added between the upstairs floor joists and the new ceiling have quieted it down a lot as well and yes, so did surrounding the vent work with insulation and 5/8″ thick wood panels.
I put in an electrical socket on the furnace side of the wall just to the right of the door you see in the second photo so any work needed to be done on the furnace could be well lit using a light mounted there. Also, I left a large enough space between the wall and the furnace to allow a comfortable and sizable space for doing any work on the furnace and for replacing the furnace filter as needed.
The vent for heating the room can be opened and closed as needed. Adding all of the insulation has made this room physically more comfortable without the need for heat, so far. Of course winter is coming and this will be the real test as far as how much and how often I will need to open the vent to keep the room at a comfortable temperature. Both heating and cooling is provided to the room through this same vent, central air conditioning.
The total finished room size came out at 12′ 3″ at it’s widest point by 19′ 2″ at it’s longest point, a total of approximately 232 square feet.
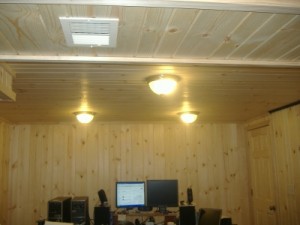
This next photo shows a long view of the room without much decoration. The point of the photo was to show the new lighting. Before there was only one light where the single light fixture is shown. I had to use a couple of different portable lights and extension chords before so this lighting set-up is substantially different and considerably more effective.
Also, I want to point out the left of the photo because this shows the more complex set of planes that were discussed in the previous post about challenges but from a different angle. I have shown an additional photo below showing this in more detail and from a different angle as well.
On the right side of the photo, the furnace gas line is shown, the black line on the right, where the wall and ceiling meet. I chose to leave it exposed because I wanted to hang a drapery from it so when I record my guitar playing it will show really well and the “hanger rod” is already there. Further, the heavy curtain will help dampen sound while recording in the room.
What is clearly seen in this photo is the beauty of the knotty pine siding where I alternated the grooved side of the panel with the flat or non-groove side. It reminds me of being up high in the Sierra mountains when I visited on many occasions while living in Southern California. I thoroughly enjoyed those visits, miss them, and so this new studio for me is a pleasant reminder of my wonderful mountaineering experiences. It is a current anchor for remembering them.
The door on the left rear is the second new door put into the room. It leads to my workshop. Sounds impressive but it’s not:)
Here is a longer view of the built-in bookshelf and an additional view of the multiple planes that were difficult to tie together. The white doors to the left of the bookshelf are for other built-in cabinets that I had made several years before. The doors and trim will be changed soon and replaced with knotty pine doors to match the remainder of the room. Total cabinet and bookshelf storage inside the room is just over 14 linear feet floor to ceiling so I now have enough space to store and/or put away anything that I am not using. I didn’t think I could do the bookcase but the results were very good for a non-carpenter.
The white vent shown above and to the right of the built-in bookcase is an air exhaust vent leading to the outside of my home. It is just above the only window in the room where I can open it to get fresh air into the room during warmer months of the year. I wanted to have a way to clear the air so to speak and this vent was added enabling that. I had to drill a 4″ diameter hole in the 2×12 running left to right. It is the main floor joist for the house. To do that, I needed a special hole saw that was extremely expensive. It seemed like such a waist as all I needed was one hole drilled with it. The difficulty was not only drilling the large diameter hole but aligning the vent work between the hole and the fan housing. The housing was mounted on the overhead floor joist. The hole was drilled before placing the vent housing. I didn’t realize I had caused myself a problem creating an offset between the connecting tube and the hole that was drilled. There was not a whole lot of space to work in either. I was a cramped and small space for a big guy like me to work in.
Well folks, here we are close to the end of this series of posts about my home studio project and the final results of my efforts. The years of thinking about making this possible and then finally getting around to doing it makes me wonder why I took so long to get off my backside and to get to it. None-the-less, finally, it is finished, again with the exception of a few much smaller things to tweak to totally complete my home studio project.
For concluding this post I wanted to show you what the finished project looks like with my furniture and equipment in place. So, the following two photos show what my DAW looks like once in place and setup ready for use. To say the least, I am thrilled with this new space, my new studio and I still cannot believe that I did it almost completely on my own.
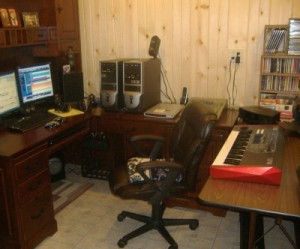
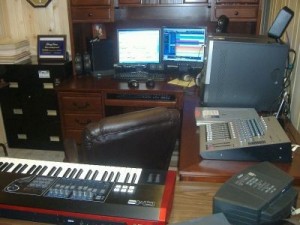
The photos above shows a view from the left and one from behind my music DAW after being setup in the room. When sitting in my chair I am facing North. My new desk is shown here and making this purchase was a difficult decision. I thought of going with a standard DAW desk setup but after long and careful thinking about my actual needs I chose this one for various reasons. With this setup I am almost surrounded by the equipment I use to write and compose music. All of the gadgets are well within an arms length. Just to the right of the keyboard in the second photo is my setup for playing and recording for the guitar. All in all this is a compact setup, highly useful and comprehensive for what I do and how it is I do it.
This next photo shows the space where I can record/play/practice guitar and as pointed out it is in an easy and comfortable reach to the main DAW setup . It is so close that I can record sitting in this area without any difficulty when adjusting the recording equipment.
Here in this area, I also added a cherry barrister bookcase to hold all of my guitar music. The piano bench works well for me as it forces me to sit properly when playing and it works to stay in close proximity to the microphone stand and the DAW. The footstool is the smaller rectangle under the piano bench. I am planning on purchasing a cherry/wooden music stand to make this a very elegant location in the room for playing and recording guitar. I am sure I will be moving things around a bit as I get back into my music writing and back to my guitar practicing/playing.
All in all I think it is well worth the costs and the effort to do this project. I hope you can see the results in the above photos. I’m not a photographer either.
For those curious to know how much this project costs – with the exception of $650 for the professional electrical work, $179 dollars for tools needed to do the work and $36 for a bottle of Crown, I spent just over $1,700 ($7.33 per square foot) for the entire project. When you think about it, adding 232 square foot of living space to a home and the added value it gives to the property, it is rather cheap, don’t you think? I had gotten two quotes from General Contractors at over $6,000 so by doing it myself I saved a huge amount of money for this project. I also secured a quote from a friend of mine, who is in construction, for adding just walls to this room. His quote was $3,000. Another quote was for $2,400 to add just a drop ceiling from another.
Another point to consider about this projects cost is the fact that it took me a total of about nine weeks to complete. Adding all costs together that equals $ about $2,550, (a total of $550 over budget because I forgot to figure in the costs for an electrician). If I divided that number by the nine week time period it cost me about $300 per week for everything. Here’s the best part, it’s already completely paid for:) That too is a result I can live with! Now I can simply enjoy working and playing in my bran new home studio without worrying how to pay for it.
I truly hope that this blog series entices and urges you on to make your own home studio. One that is suitable for your interests and for the necessary equipment that you use. One thing I can say for certain is – you never know what you can do until you try! Doing the work yourself is very rewarding. Good luck in your own home studio project. The results you get will be in direct proportion to the effort you put into it.
I also put together a short slide presentation showing more of the equipment I use and some additional pictures. Please feel free to stop by to preview the slide show of my home studio project after it was completed. Do stop by for a look!
My Home Studio Project – Results


